LangGraph 实战:用动态断点实现「可中断、可恢复」的智能工作流
🔧 LangGraph 实战:用动态断点实现「可中断、可恢复」的智能工作流
💡 一句话总结:NodeInterrupt + MemorySaver = 让 AI 工作流学会「暂停思考」和「人工介入」
🎯 为什么需要动态断点?
在传统的工作流引擎中,流程一旦启动就会一路执行到底。但在真实的 AI 应用场景中,我们常常需要:
- 🔍 人工审核:敏感内容生成后暂停,等待人工确认
- 🔄 动态决策:根据中间结果决定下一步走哪条分支
- 🛑 异常拦截:输入不符合预期时及时中断,避免资源浪费
- 💾 状态持久:服务重启后能从断点继续,不丢失进度
LangGraph 的 NodeInterrupt 机制,正是为解决这些问题而生。
🧩 代码拆解:三步构建可中断工作流
📦 第一步:定义状态结构
1 | from typing_extensions import TypedDict |
✨ 使用
TypedDict保证类型安全,让状态流转更清晰可控。
⚙️ 第二步:编写含断点逻辑的节点
1 | from langgraph.errors import NodeInterrupt |
🔑 核心技巧:在任意节点中抛出
NodeInterrupt异常,即可触发工作流暂停,且自动保存当前状态。
🔗 第三步:构建图 + 启用记忆检查点
1 | from langgraph.graph import StateGraph, START, END |
🗂️
MemorySaver是 LangGraph 的「记忆中枢」,负责持久化每个线程的状态,让「暂停 - 修改 - 继续」成为可能。
🔄 执行流程演示:中断 → 查看 → 修复 → 继续
🚨 场景:输入 "hello world"(11字符)触发断点
1 | initial_input = {"input": "hello world"} |
输出:
1 | ---Step 1--- |
✅ 此时工作流暂停在
step_2,状态已自动保存,等待人工干预。
🔍 查看中断详情
1 | state = graph.get_state(thread_config) |
📋 可获取:当前节点、中断原因、任务状态等,便于前端展示或日志记录。
🛠️ 修复状态:修改输入,绕过断点
1 | # 将长输入替换为短输入 |
💡
update_state是「人工介入」的关键 API,允许你在中断点修改状态,实现动态纠偏。
▶️ 恢复执行:从断点继续
1 | # 传入 None 表示从上次中断处继续 |
输出:
1 | ---Step 2--- |
🎉 工作流顺利走完剩余节点,全程状态无缝衔接!
🧠 核心知识点总结
| 概念 | 作用 | 关键代码 |
|---|---|---|
NodeInterrupt |
动态中断工作流 | raise NodeInterrupt("msg") |
MemorySaver |
持久化线程状态 | compile(checkpointer=memory) |
thread_id |
隔离不同执行实例 | {"configurable": {"thread_id": "1"}} |
update_state |
人工修改中断状态 | graph.update_state(config, new_values) |
stream(None, ...) |
从断点恢复执行 | 传入 None 作为输入 |
🌰 实际应用场景推荐
✅ 场景 1:内容审核工作流
1 | 用户输入 → 敏感词检测 → [中断] → 人工审核 → 继续生成 → 输出 |
✅ 场景 2:多轮决策代理
1 | 收集信息 → 判断是否足够 → [中断] → 请求用户补充 → 继续推理 → 给出建议 |
✅ 场景 3:长任务分步执行
1 | 数据预处理 → 模型推理 → [中断] → 人工校验中间结果 → 后处理 → 输出报告 |
💡 所有需要「人在环路(Human-in-the-loop)」的场景,都是
NodeInterrupt的用武之地。
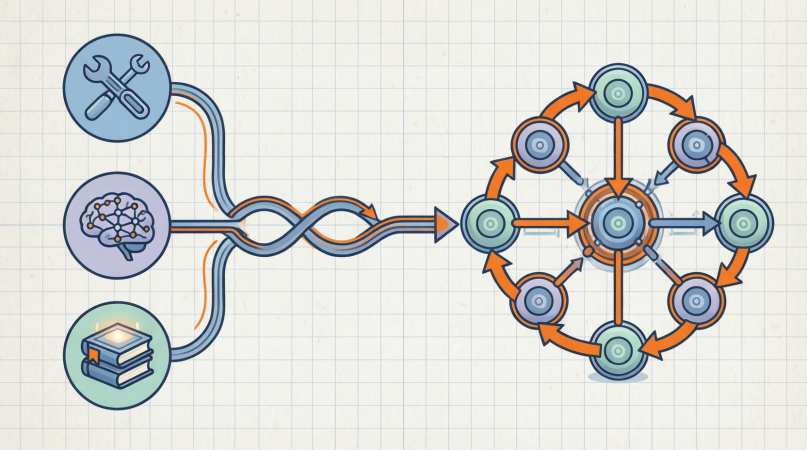
🎨 视觉化建议(公众号配图思路)
📌 根据技术博客美学偏好,推荐以下插图风格:
流程图插画
- 风格:扁平化矢量 + 科技蓝/电光青配色
- 内容:用箭头连接
START → step_1 → step_2(⚠️) → step_3 → END,在 step_2 添加「暂停」图标和「人工介入」气泡
状态机示意图
- 风格:3D 等距 + 发光节点
- 内容:展示
input: "hello world"触发中断 →update_state修改 → 继续执行的三阶段状态变化
架构组件图
- 风格:赛博朋克线框 + 脉冲光效
- 内容:
LangGraph Engine居中,连接MemorySaver(数据库图标)、NodeInterrupt(警示灯)、Human UI(用户头像)
🖼️ 可使用 Mermaid 快速生成基础流程图,再用 Figma/Illustrator 添加品牌视觉元素。
📚 延伸学习
本博客所有文章除特别声明外,均采用 CC BY-NC-SA 4.0 许可协议。转载请注明来源 Nosaw博客!
相关推荐
2026-01-17
从零理解 LangChain + LangGraph 的工具调用机制
🧠 从零理解 LangChain + LangGraph 的工具调用机制 目标:掌握如何使用 LangChain 定义函数工具(tool),并通过 LangGraph 构建一个能自动调用工具的智能体(Agent-like)流程。 一、代码整体结构概览这段代码实现了以下功能: 安全设置环境变量(OPENAI_API_KEY 和 OPENAI_BASE_URL) 初始化一个支持工具调用的大语言模型(LLM) 定义一个 Python 函数作为“工具”(multiply) 将工具绑定到 LLM 上,使其能“理解并调用”该函数 使用 LangGraph 构建一个状态图(StateGraph),实现单节点推理流程 测试两种输入:普通问候 vs 工具调用请求 最终,当用户说 “Multiply 2 and 3” 时,模型应返回一个包含 tool_calls 的 AIMessage,指明要调用 multiply(a=2, b=3)。 二、关键组件详解1. 环境变量安全设置123def _set_env(var: str): if not os.environ...

2026-01-24
从一行代码到智能系统:LangGraph路由器模式的深度解析
从一行代码到智能系统:LangGraph路由器模式的深度解析 在AI技术快速发展的今天,如何让大语言模型智能地决定何时使用工具、何时自己回答?LangGraph的路由器模式给出了一个优雅的解决方案。让我们一起深入探索这段代码背后的智能奥秘。 一、环境配置:智能系统的基石任何强大的AI系统都需要稳定的基础,我们从环境配置开始: 12345678def _set_env(var: str): """安全地设置环境变量""" if not os.environ.get(var): os.environ[var] = getpass.getpass(f"{var}: ")# 双保险配置:API密钥和代理地址_set_env("OPENAI_API_KEY") # 身份凭证_set_env("OPENAI_BASE_URL") # 访问通道 设计哲学: 安全性优先:使用getpass隐藏敏感信息输入 灵...

2026-01-24
用 LangGraph 构建会记住上下文的 AI 算术助手:从工具调用到状态记忆
用 LangGraph 构建会“记住上下文”的 AI 算术助手:从工具调用到状态记忆 一句话摘要:本文带你用 LangChain + LangGraph 实现一个支持多轮对话、能调用自定义函数、并具备“记忆”能力的智能算术助手——它不仅能算 3+4,还能接着把结果乘以 2! 引言:为什么我们需要“有状态”的 Agent?在传统的 LLM 调用中,每次请求都是无状态的。比如你问“3加4等于多少”,模型回答7;再问“乘以2是多少”,它可能不知道你指的是哪个结果。 但现实中的智能体(Agent)必须能记住上下文、调用工具、并在多轮交互中保持一致性。这正是 LangGraph 的核心价值:它让你用图(Graph)的方式构建具备状态、记忆和决策能力的 AI 系统。 今天,我们就用一个极简但完整的例子,手把手搭建一个带记忆的算术助手。 第一步:准备环境与密钥我们使用 OpenAI 兼容的 API(例如 DeepSeek、Moonshot 或你自己的代理),并通过 getpass 安全输入密钥: 12345678import os, getpassdef _set_env(var: st...

2026-03-01
LangGraph 实战:给 AI 智能体加上「人工审批」断点
🔧 LangGraph 实战:给 AI 智能体加上「人工审批」断点,让工具调用更安全可控 💡 一句话总结:用 interrupt_before 在工具执行前插入人工确认环节,构建可审计、可干预的 Agent 工作流。 🎯 为什么需要「断点审批」?在真实业务场景中,让 AI 直接调用工具(如数据库写入、支付接口、文件删除)风险极高。我们希望在 关键操作前 插入一个人工确认环节: 1用户提问 → AI 分析 → 决定调用工具 → ⚠️ 暂停等待审批 → 用户确认 → 执行工具 → 返回结果 这正是 LangGraph 的 interrupt_before 机制的用武之地。今天我们就用一段完整的代码,拆解如何实现这个「安全断点」。 🧱 代码结构全景图graph LR Start([开始]) --> Assistant[🤖 Assistant 节点] Assistant -->|需要工具? | Condition{tools_condition} Condition -->|是 | Tools[🛠️ Too...

2026-03-07
LangGraph实战:用状态图构建智能算术助手,解锁AI的时间旅行能力
LangGraph实战:用状态图构建智能算术助手,解锁AI的时间旅行能力大家好,今天我要和大家分享一个有趣的LangGraph实战项目。我们将构建一个能够执行算术运算的智能助手,并深入探索LangGraph最强大的特性之一——时间旅行。 为什么选择LangGraph?在构建复杂的AI应用时,我们常常需要管理多轮对话、控制流程、保存状态。传统的LangChain链式调用虽然简单,但难以处理复杂的交互逻辑。而LangGraph的出现,完美解决了这个问题: 状态管理:像Redux一样管理AI应用的状态 可控流程:清晰地定义节点和边,让AI的思考过程透明化 时间旅行:可以回放、分支和修改历史状态 项目概览:算术智能助手我们要构建的助手具备以下能力: 支持加法、乘法、除法运算 通过工具调用执行具体计算 具备完整的对话记忆能力 支持时间旅行调试 1. 环境配置与工具定义首先,让我们设置必要的环境变量和工具函数: 123456789101112131415161718192021222324252627import os, getpassfrom langchain_openai im...

2026-03-22
从0到1掌握 LangGraph:并行、嵌套、状态合并一网打尽
从0到1掌握 LangGraph:并行、嵌套、状态合并一网打尽 📌 导读 你是否遇到过这些问题: 看到 LangGraph 代码就头大,不知道从哪开始学? 知道要用,但看不懂嵌套子图和状态合并? 想写个工作流,却被各种概念绕晕? 别担心! 今天我用 3 个递进式示例,带你从零理解 LangGraph 的核心机制。 学完你将掌握:✅ 节点、边、状态的基本用法✅ 并行执行的实现方式✅ 子图嵌套和状态合并技巧 无需基础,直接开干! 👇 🎯 核心概念一图看懂在写代码之前,先记住这个公式: 1LangGraph = 状态字典 + 节点函数 + 执行顺序 打个比方: 状态(State) = 一个共享的记事本,所有节点都能读写 节点(Node) = 一个个工人,每人负责修改记事本的某些内容 边(Edge) = 工人之间的交接顺序 是不是简单多了?让我们开始实战! 🔰 Level 1:最简单的图(5分钟上手)🎯 学习目标: 理解”节点如何修改状态” 代码示例1234567891011121314151617181920212223242...
评论